
Opening your car’s hood can seem daunting for beginner drivers or those who’ve never needed to access the engine compartment before. However, the process for unlatching and lifting the hood is actually quite simple once you know where to find the release lever or button inside your vehicle’s cabin. Learning proper technique to open the hood makes routine maintenance like checking oil and fluids hassle-free.
Gaining familiarity with your car’s hood release mechanism empowers you as an owner. Knowing how to pop the hood, locate the prop rod to hold it up, and safely lower it after inspection will build driving confidence. With some models, you may even be able to open the hood manually from outside in an emergency. Mastering these basics helps you feel more connected to your vehicle and educated on its features for optimal performance.
This intro covers the key steps, precautions and variations in opening your car’s hood across makes and models. A quick how-to helps decode this simple but critical task, making you a savvier, more self-assured driver. So read on to learn the method for your vehicle and get ready to unveil the engine components under that mysterious hood with newfound expertise.
7 Steps to Open Your Car’s Hood
Popping open your car’s hood is the first step toward many DIY auto repairs and maintenance tasks. While hood designs vary by make and model, the general process remains similar. Follow these 7 key steps to safely unlatch and open your vehicle’s hood:
1. Locate the Hood Release Lever Inside the Cabin
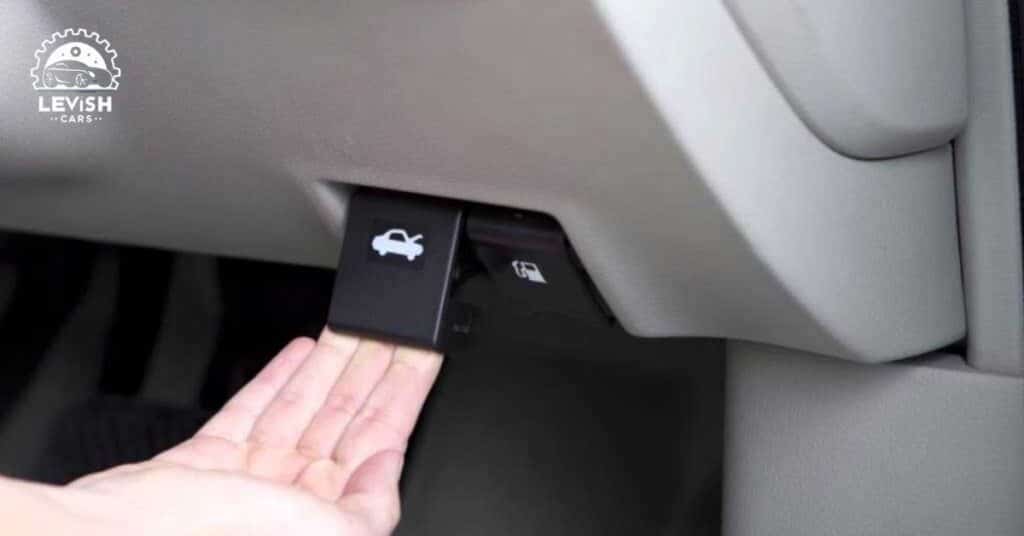
The hood release lever or button is located somewhere on the driver’s side interior. Check around and underneath the steering wheel or dash. It may be near the floor, center console, or where your knee would be while driving. Consult your owner’s manual if you can’t find it.
Grip the lever handle and pull it toward you or push it away to disengage the hood latch. You should hear a metallic “pop” or click sound. Now the hood is unlocked and ready to open.
2. Find the Secondary Hood Release Latch
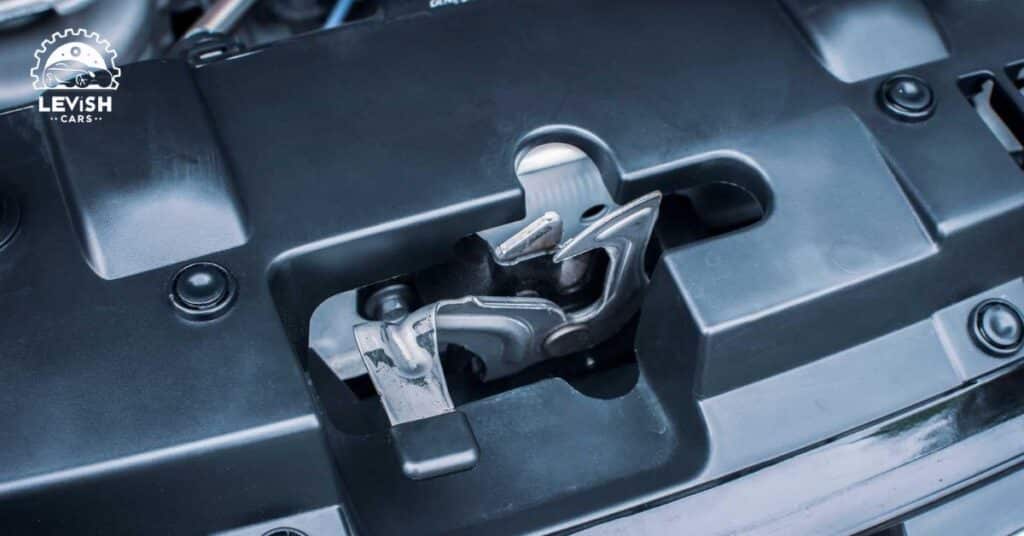
On most vehicles, you’ll need to locate an exterior secondary latch as well after using the interior lever. This serves as an added safety precaution.
Walk to the front of the car. There should be a small lever, handle or tab under the front edge of the hood near the grille. Lift this handle up or slide the tab over to the side to fully release the hood locking mechanism.
3. Lift Up the Hood Gently
Stand in front of the car’s grille. Place one hand flat under the front center of the hood to stabilize it. Avoid grasping the hood ornament if there is one.
Now use your other hand to lift the hood up from either the left or right front edge. Gently lift it about halfway. Let it rest for a moment to make sure it doesn’t swing back down.
Use slow, steady lifting force to avoid any slamming or damage. Most hoods will stay suspended at about the halfway point once opened this far.
4. Find the Hood Prop Rod
Before fully opening the hood all the way, you need to locate the prop rod that will hold it up. This rod is usually attached to the underside of the hood towards the windshield.
Grab the prop rod’s rubber-coated end. Determine where the rod’s opposite end fits into a bracket on the car’s body near the grille. Insert it securely into position to brace the hood open.
5. Raise the Hood Fully
With the prop rod in place, use both hands to lift the hood up fully. Bring it all the way up until the support strut or hydraulic cylinders kick in to hold open vertically.
Listen for a solid click to confirm the locking cylinders have engaged. The hood should now remain safely propped open without you having to hold it.
6. Inspect and Maintain
Now you have full access to the engine compartment. Check oil, fluid levels, battery, belts, hoses and connections. Make repairs or fill if needed.
Follow your vehicle service schedule and refer to the manuals for guidance on proper inspection points. Having the hood fully open makes maintenance much easier.
7. Closing the Hood Securely
When finished, it’s crucial to secure the hood completely to prevent it flying open while driving. Remove the prop rod first and stow it back in its holder.
Using both hands, lower the hood gently halfway down. Let it drop from this point to fully close using the weight. It should latch into locked position with a decisive thud.
Double check the latch by gently pushing up on the front edge of the hood to confirm it’s shut. Never drive with it even slightly ajar.
Opening your car’s hood seems mysterious at first but gets easy with some practice. Following these key steps will build confidence for beginning drivers doing self-maintenance. Caution is advised, and be sure to have the owner’s manual handy just in case your model has unique hood release instructions. Taking it slow ensures you can get the hood safely open without kinks. Soon you’ll unlock that hood like a pro!
Final Thoughts
Getting under your car’s hood starts with a few simple steps to locate and release the safety latches. Now that you know the basic hood opening sequence for your vehicle, you can access the engine bay with confidence for DIY maintenance. Consistent practice builds proficiency over time, so don’t be discouraged if it takes a few tries to get the motions smooth. Soon, you’ll lift that hood like a pro. This hands-on knowledge helps you feel empowered as an informed, self-reliant driver who isn’t intimidated by basic auto servicing.

Hey there! I have 5 years of experienced repairing all makes and models. Specializes in engine diagnostics, brake repair, electrical systems, and teaching DIY maintenance tips. Passionate about keeping cars running safely.